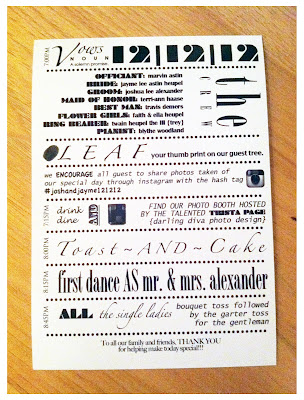
i was waiting to post this until other pictures from the wedding were available but since its been almost four months....
Monday, March 25, 2013
Sunday, March 24, 2013
DIY "CREME DE LA CREME" TANK
i printed out the letters i wanted and use a adjustable spray tack to attached it to the leather. then i cut out each individual letter. i used the spray tack to place them on the tee and then added a couple stitches by hand to keep each letter in place.
Labels:
DIY
Thursday, March 21, 2013
DIY TEE UPDATE W/POMS
i came across this awhile back and figured i could make my own version using little pom you can buy at the craft store. i bought the pom but never got around the sewing them on because it would be really time consuming. well we went up to seattle a couple weekends ago so i packed a few crafts for myself to work on on the way up.
i didn't add as many as the above picture but the beauty of this is i can always add more or take some off. hand stitching each individual pom on doesn't hurt the fabric or leave any visible holes.
Labels:
DIY
Wednesday, March 20, 2013
DIY BEADED SHIRT
yes i sewed on each little bead by hand. i had a little time when i was home from work one day re-cooperating. but i love it and again it has been on my to do list for awhile.
Labels:
DIY
Monday, March 18, 2013
DIY PATCHES
simple.
buy fabric. cut it it shape. sew on. if you are using a sewing machine with sequins make sure you have a strong enough needle or else you will probably break it.i sewed mine on my hand because i couldn't maneuver the machine inside the sleeves. and i only sewed through the material NOT the sequins.
Labels:
DIY
Thursday, March 14, 2013
Wednesday, March 6, 2013
CAPE FASTENERS
back in october i made this cape for my hamburglar costume and i've worn it a couple times since but i wanted to make a little update to i added fasteners with buttons and slits for my hands. i cut pieces pieces of leather to size and pinned them to the cape and adjusted them if necessary. then i sewed on the buttons and cut slits in the leather for them to fit through.
Labels:
DIY
Tuesday, March 5, 2013
INTO INFINITY SCARFS
i love scarfs and have many but i am just not feeling most of them and i realized the reason why because they aren't infinity scarfs so i decided to do an easy upgrade and stitch the ends together.
Labels:
DIY
Friday, March 1, 2013
DIY BREAKFAST AT TIFFANY'S MASK
materials needed:
piece of super soft fabric (for laying against your face)
elastic (to fit around your head & then some)
about 1 yard of twisted gold rope
1 piece of tiffany blue felt
elastic (to fit around your head & then some)
about 1 yard of twisted gold rope
1 piece of tiffany blue felt
about 5" of gold fringe rope
hot glue gun, glue & scissors
directions:
i used the glue gun to stick these two together. only put the glue around the outer edge and leave unglued areas on the sides to attach the elastic band.
glue and wrap the twisted rope around the edge of the felt. i put a little glue on the cut ends of the rope so it doesn't unravel.
cut out the eye lids.glue the lashes (gold fringe rope) to each eye lid. you can trim the lashes if needed. to glue the lids down only put glue around the edges but not at the lash line. pinch the lid at the lash line a little bit and then stick it to the felt in the appropriate spot.
you can add eyebrows by cutting small pieces of the braided rope and gluing them down.
glue one side of the elastic between the felt and soft material and then glue the edges down and repeat for the other side.
ta-dah! now you can be just as fancy as audrey hepburn.
Labels:
DIY
Subscribe to:
Comments (Atom)


